
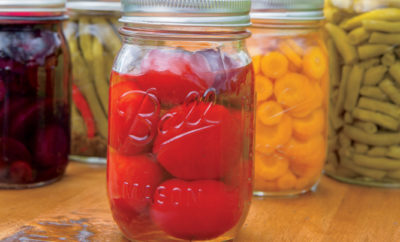
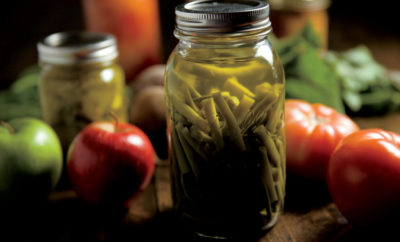
Canning 101

Just thinking about home canning conjures up memories of my Aunt Genny “putting up” batches of tomato sauce and green beans. Canning helps connect us to family, heritage and culture, and it’s a wonderful way to extend the life of your summer bounty. Opening a jar of fresh tomato sauce or pickled cucumbers in the middle of winter is almost enough to bring back the warmer months.

The word canning may bring to mind childhood memories of scary sounds from the stovetop and an eternity spent in the kitchen. Rest assured, today’s pressure cookers and water-bath canners are safer and easier to use.
SEE ALSO: Sweet on the Bonnie Blue
While preserving your own food is rewarding, it can make you very sick if done incorrectly. I recommend partnering with an experienced canner your first time around, especially if you tend to fly by the seat of your pants when it comes to following recipes. (Editor’s note: The University of Tennessee Agricultural Extension Service also provides assistance with learning how to can. Find your local extension agent at utextension.tennessee.edu.) The canning process varies depending on the food being preserved, so make sure you follow a reliable recipe.
It’s a good idea to borrow equipment the first time you try canning, but I’m guessing after one try, you’ll catch the canning bug and invest in your own.
SEE ALSO: Strawberry Freezer Jam Recipe

Basic Steps for Canning
- Clean jars and lids with hot water and soap. This can also be done in the dishwasher.
- Sterilize jars and lids by submerging in boiling water, right side up, for 10 minutes.
- Keep jars hot in a pot of simmering water until ready to fill.
- Fill jars with hot food, leaving headspace as recommended in the recipe. This space allows the food to expand during processing and creates a vacuum seal.
- Wipe the rim of the jar to clean and ensure a good seal, and place lid.
- Tighten the screw bands just enough to secure; do not over tighten.
- Process in either a pressure cooker or hot water bath, depending on your recipe.
- Remove jars from canner and cool. Listen for the lids to pop, indicating a good seal.
- Remove the screw bands once the jars are cool. Lids should be secure on the top of the jar.
- Store jars in a dark pantry that stays between 50 and 70 degrees.
Green Tomato Chow Chow
Chow Chow, a staple on most Southern tables, is a tasty way to use your abundance of tomatoes, onions and peppers.
Estimated prep time: 30 minutes
Refrigeration time: 12 hours
Makes: 11 pints
Ingredients
- 1 peck (12 ½ pounds) green tomatoes, quartered
- 8 large onions, coarsely chopped
- 10 green bell peppers, seeded and chopped
- 6 hot peppers, seeded and chopped
- 3 tablespoons pickling salt
- 2 cinnamon sticks (3 inches each), halved
- 4 bay leaves
- 1 tablespoon allspice
- 1 teaspoon cloves
- 1 quart cider vinegar
- 1 ¾ cups sugar
- 3 cloves garlic, minced
- 3 tablespoons dry mustard
Equipment
- 1 medium-sized cheesecloth (to make a spice bag)
- 1 large non-aluminum stockpot
- 11 pint glass jars with canning lids
Instructions
- Combine tomatoes, onions and peppers in a bowl. Sprinkle with pickling salt, cover and refrigerate for 12 hours or overnight. After 12 hours, rinse under cold running water and drain, removing as much liquid as possible.
- Use the cheesecloth to make a spice bag containing the cinnamon sticks, bay leaves, allspice and cloves.
- In the stockpot, combine vegetables, spice bag, vinegar, sugar, garlic and dry mustard. Bring to a slow boil and cook for about 15 minutes or until the tomatoes are transparent and tender. Stir frequently. When done, remove spice bag, and place the chow chow in sterile glass jars. Gently push the mixture down in the jar to be sure there are no air pockets. Leave about a half-inch of space at the top. Seal by adding lids and rings to each jar.
- Consult canning lid manufacturer’s directions and process jars in a boiling water bath to seal.
Refrigerator Pickles
These are a staple in my fridge all summer. The crisp, tart cucumbers and onions are delicious right out of the jar. These will keep in the refrigerator for one to two months.
Estimated prep time: 15 minutes
Refrigeration time: 24 hours
Makes: 1 half-gallon
Ingredients
- 2 cups water
- 1 ¼ cups white vinegar
- 2 cups sugar
- 1 tablespoon salt
- 2 large cucumbers, sliced
- 1 small onion, sliced
- 1 tablespoon fresh dill, chopped
- 1 teaspoon peppercorns
Equipment
- 1 half-gallon Mason jar with canning lid
Instructions
- Combine water, vinegar, sugar and salt in a nonreactive pot. Bring just to a boil (so ingredients are dissolved), then remove from heat and cool to room temperature.
- Place the cucumbers, onion, dill and peppercorns in the jar. Pour in the vinegar mixture.
- Screw on the jar lid tightly, and place in the fridge. Chill for at least 24 hours before serving.


Leave a Comment